How to Use Vacuum Forming Plastic for Your Next Project Efficiently
Vacuum forming plastic is a versatile manufacturing process that has gained popularity for its ability to create intricate and lightweight components across various industries. Whether you are an experienced designer or a DIY enthusiast, understanding how to effectively utilize vacuum forming plastic can elevate the quality and efficiency of your projects. This technique involves heating a plastic sheet until pliable, then using a vacuum to mold it over a shaped form, resulting in precise and durable products.
In this article, we will explore the fundamental aspects of working with vacuum forming plastic, focusing on best practices and efficient methods to optimize your workflow. By breaking down the steps involved in the vacuum forming process, from material selection to finishing techniques, we aim to provide valuable insights that can contribute to a successful production experience. Whether you're crafting prototypes, custom parts, or artistic creations, mastering vacuum forming plastic will allow you to achieve professional results while minimizing time and resource expenditure.

Understanding Vacuum Forming Plastic: A Comprehensive Overview
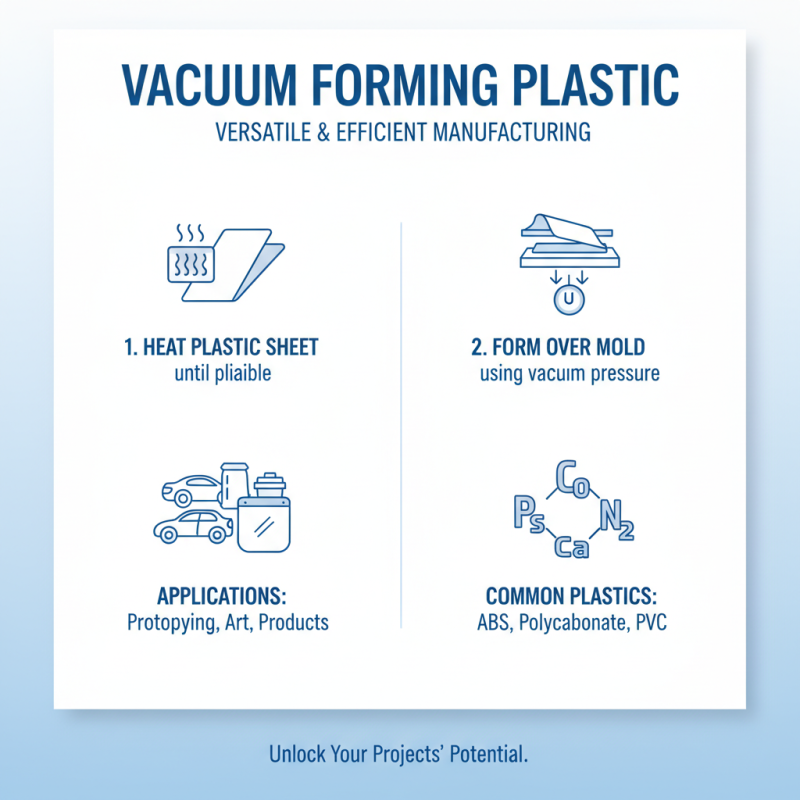
Vacuum forming plastic is an innovative manufacturing technique that offers versatility and efficiency for various projects, from prototyping to artistic endeavors. This process involves heating a plastic sheet until it becomes pliable and then forming it over a mold using vacuum pressure. Understanding the fundamental aspects of vacuum forming is crucial for achieving optimal results in your projects. The types of plastics commonly used include ABS, Polycarbonate, and PVC, each offering different properties suited to specific applications.
When embarking on a vacuum forming project, here are some valuable tips to keep in mind. First, always ensure your mold is smooth and properly prepared; imperfections can transfer to the finished product. Additionally, consider the thickness of the plastic sheet you are using. Thicker sheets provide more durability, but too much thickness can lead to uneven heating, making the process less effective. Lastly, make sure to maintain appropriate temperatures to avoid warping or burning the plastic, which could compromise your project's integrity.
By understanding the essentials of vacuum forming plastic, including the right materials and techniques, you can create high-quality, custom parts that meet your project's specific needs. Experimenting with different molds and finishes can also provide unique and visually appealing results.
Selecting the Right Materials for Vacuum Forming Projects
When embarking on a vacuum forming project, selecting the right materials is crucial for achieving optimal results. The choice of plastic can greatly influence the final product's durability, flexibility, and suitability for its intended purpose.
Commonly used materials include polystyrene (PS), which is lightweight and cost-effective, making it ideal for prototypes and low-volume production. For more demanding applications, acrylic or polycarbonate may be suitable due to their enhanced strength and clarity, allowing for intricate designs without sacrificing structural integrity.
It's also essential to consider the thickness of the material, as this can affect the heat distribution during the forming process. Thinner sheets tend to conform better to complex molds and can reduce production time, while thicker materials may be necessary for products that require additional rigidity. Additionally, understanding the material's heat tolerance and cooling rates is vital, as improper handling could lead to warping or imperfections. By carefully selecting and preparing the right materials, you can ensure a successful and efficient vacuum forming project.
Step-by-Step Guide to Preparing Your Vacuum Forming Setup
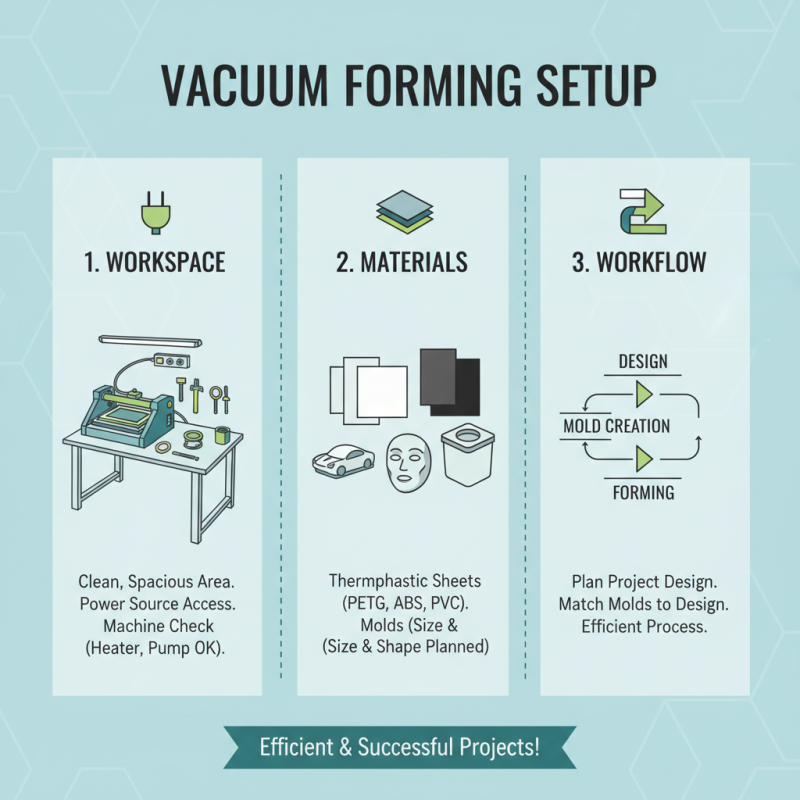
Preparing your vacuum forming setup is crucial for achieving efficient and successful results in your project. Begin by selecting a clean, spacious work area with access to a power source. Ensure that your vacuum forming machine is in good working condition, with all necessary components—such as the heating element and the vacuum pump—operational. Next, gather the materials you'll be using, such as thermoplastic sheets, which should be compatible with your project's design requirements. Planning your workflow will help determine the size and shape of the molds you will be using.
Once your materials and tools are ready, create your mold from a sturdy material that can withstand heat, like wood, metal, or plastic. It’s essential that the mold is free of imperfections, as any flaws will transfer to the final product. After crafting the mold, set it in place on the vacuum forming table, ensuring it’s securely fastened. Preheat your thermoplastic sheet according to the manufacturer's guidelines and then position it over the mold. Finally, activate the vacuum system carefully to conform the heated plastic around the mold, maintaining a smooth and uniform finish throughout. This organized approach will streamline your process and enhance the final output of your vacuum forming project.
Techniques for Efficient Vacuum Forming and Molding
Vacuum forming is an essential technique in plastic manufacturing that allows for the creation of intricate shapes and components with a smooth finish. To ensure the process is efficient, several key techniques should be employed. First, selecting the right type of plastic is crucial. According to a report by the Plastics Industry Association, ABS, polycarbonate, and PVC are among the most popular materials for vacuum forming due to their excellent moldability and thermal properties. Understanding the specific requirements of your project, such as heat resistance or flexibility, will aid in material selection.
Another significant factor for efficient vacuum forming is optimizing the heating process. Properly heating the plastic sheet to the correct temperature ensures it becomes pliable enough to mold accurately to the contours of the tooling. For optimal results, maintain a consistent temperature across the material, as this can affect the final shape. Utilizing an infrared heating system can enhance this process by allowing for quick and uniform heating, reducing cycle times.
Tips for efficiency: Ensure your tooling is well-designed with proper draft angles to enable easy removal of the final product. Additionally, consider using a vacuum gauge during the forming process to monitor the pressure inside the mold. This attention to detail can significantly improve the quality and repeatability of your vacuum-formed products, ultimately leading to less material waste and higher productivity in your projects.
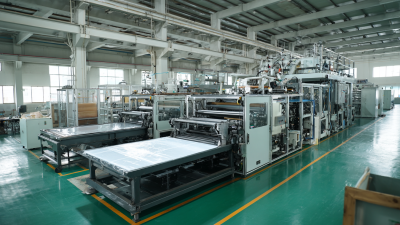
Vacuum Forming Plastic Usage in Different Industries
Post-Processing Tips for Finished Vacuum Formed Products
Post-processing is a crucial step after vacuum forming, as it can greatly enhance the appearance and functionality of your finished products. The first key step in this process is trimming the edges. Using a sharp knife or a dedicated trimming tool, carefully remove any excess plastic that may have formed during the vacuum process. This ensures a clean edge, which is vital for aesthetic purposes and for the assembly of parts in larger projects.
Once the edges have been trimmed, consider sanding any rough surfaces. Using fine-grit sandpaper, gently smooth out the areas that might feel sharp or uneven. This not only provides a polished finish but also improves the safety of the product, especially if it will be handled frequently. For more intricate designs, utilizing a Dremel tool can achieve precision in smoothing and detailing small areas.
Lastly, applying a suitable paint or finish can dramatically change the look of your vacuum-formed items. Before painting, ensure the surface is clean and free from dust. Opt for paints that are compatible with plastic to ensure proper adhesion. Additionally, applying a clear coat afterward can protect the finish from wear and tear, extending the life of your product while enhancing its visual appeal.
How to Use Vacuum Forming Plastic for Your Next Project Efficiently - Post-Processing Tips for Finished Vacuum Formed Products
| Process Step |
Description |
Tips |
| Material Selection |
Choose the right type of plastic based on project needs. |
Consider using ABS for durability and HDPE for flexibility. |
| Heating |
Heat the plastic evenly until it is pliable. |
Use an infrared heater for uniform heating. |
| Forming |
Lower the heated plastic over the mold and apply vacuum. |
Ensure the mold is securely fastened to avoid movement. |
| Cooling |
Allow the formed plastic to cool completely. |
Use fans to speed up the cooling process. |
| Trimming |
Cut excess material away to achieve desired shape. |
Utilize sharp utility knives for clean cuts. |
| Finishing |
Smooth edges and surfaces as necessary. |
Consider sanding for a polished finish. |