How to Vacuum Form Plastic in 2026?

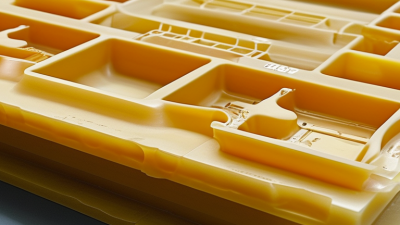
Vacuum forming plastic remains a practical way to create lightweight covers, trays, panels, prototypes, and custom enclosures in 2026. The process looks simple: heat a plastic sheet, pull it over a mold, and apply vacuum pressure. Small details matter, though. Uneven heating can leave thin corners, cloudy surfaces, or weak edges. A sheet that feels flexible may still be too cold for accurate forming.

This guide explains the complete workflow in clear, practical terms. It covers suitable materials, heater settings, mold design, vacuum systems, trimming methods, and quality checks. You will also see how draft angles, air holes, sheet thickness, and cooling time affect the final part. A workshop example might involve a 3-millimeter ABS sheet, a sealed wooden mold, and a vacuum pump strong enough to capture sharp contours. Results still depend on the machine, mold, and operator.

Real production is rarely perfect. Some first pulls wrinkle. Others stick to the mold or lose important details. That is useful feedback, not just failure. Careful operators record temperature, timing, sheet size, and defects after every trial. This habit improves repeatability and reduces material waste. The guide also considers safer heating practices, ventilation, responsible material selection, and design choices that support repair or recycling. Technical recommendations should be checked against current equipment instructions and material data sheets. A good result is not merely a formed shape. It is a part that performs reliably, looks consistent, and can be produced responsibly.
How to Vacuum Form Plastic in 2026?

What Is Vacuum Forming and How Does the Process Work?

How to Vacuum Form Plastic in 2026?

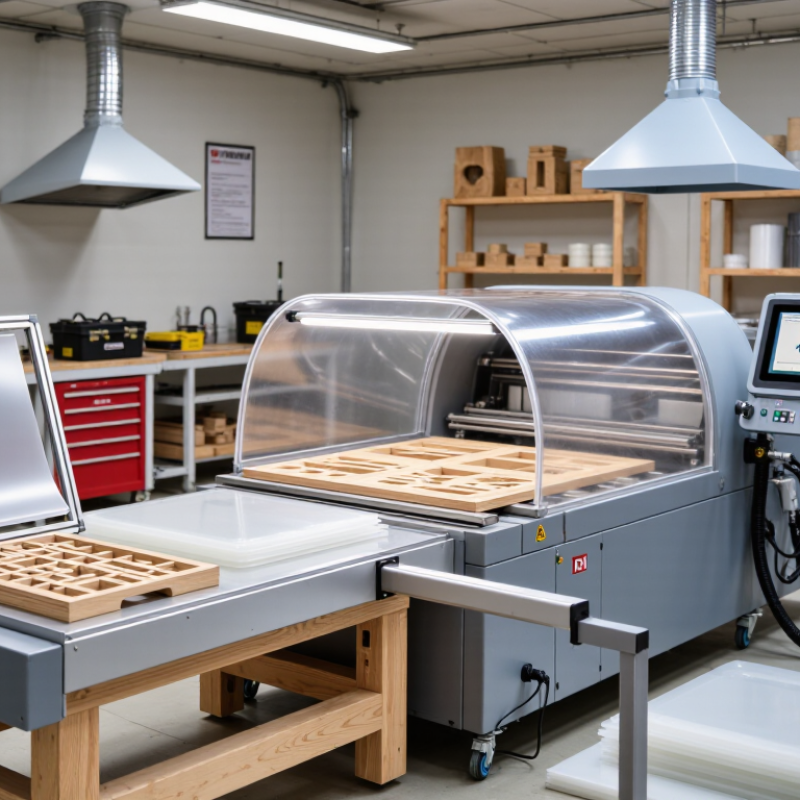
Vacuum forming heats a plastic sheet until it becomes flexible. The sheet then covers a mold under vacuum pressure. Atmospheric pressure pushes the material against the mold surface. The usual sequence includes clamping, heating, forming, cooling, and trimming. In practical workshops, operators often monitor sheet temperature, sag, and vacuum timing together. A typical system may draw 0.8–0.95 bar below atmospheric pressure. Exact settings depend on the polymer, thickness, and mold design.

The process looks simple. It is not always forgiving. Uneven heating can create thin corners, wrinkles, or cloudy areas. Draft angles help the cooled part release cleanly. Small vents also improve detail near deep cavities. PlasticsEurope reported global plastics production at 413.8 million tonnes in 2023. The OECD’s Global Plastics Outlook reported that only about 9% of plastic waste was recycled historically. These figures make material efficiency and scrap control more important. Regrind may be suitable in some applications, but quality can change.

Tips: Use a temperature test strip before production. Keep the mold surface clean and dry. Avoid sharp internal corners. Record heating time, vacuum time, and final thickness. Do not trust one setting forever. Materials age, heaters drift, and molds behave differently. I have seen operators focus heavily on vacuum strength while ignoring heat balance. That assumption is useful, but incomplete. A slower cycle can sometimes produce a more consistent part. Data from each batch is worth keeping, even when the result looks acceptable.

How to Vacuum Form Plastic in 2026?

Vacuum forming heats a thermoplastic sheet until it becomes flexible, positions it over a mold, removes air by vacuum, and then cools the formed part. The chart shows typical sheet-forming temperature windows for commonly used thermoplastics. Actual settings vary by grade, thickness, mold design, and machine.

During forming, the sheet is heated above its glass-transition or softening range, draped over the mold, and exposed to a pressure difference created by vacuum. A practical vacuum-forming system can approach atmospheric pressure differential, with many production setups operating around 60–90 kPa below atmospheric pressure.

Which Plastic Sheets, Tools, and Equipment Are Needed?

How to Vacuum Form Plastic in 2026?

Choosing the correct plastic sheet affects every stage of vacuum forming. ABS is tough and forgiving, while HIPS forms easily for prototypes. PETG offers clarity and good impact resistance. Acrylic can look attractive, but it needs careful heating because it may crack or sag. Sheet thickness between 1 and 3 millimeters suits many small projects. Thicker sheets require stronger heating and deeper vacuum control.

You need a vacuum-forming machine, a heat source, a reliable vacuum pump, and a sturdy forming frame. Keep an infrared thermometer nearby; color and softness alone can mislead you. Use a mold with rounded edges, slight draft angles, and small vent holes in trapped areas. MDF, plaster, resin, and aluminum can work, depending on heat and production demands. Seal porous molds before use. Wear heat-resistant gloves, eye protection, and provide strong ventilation.

In practical testing, heating is often the difficult part. The sheet may look ready while its center remains stiff. Then it wrinkles. It happens. Reduce uneven airflow, adjust the heating distance, or warm the sheet longer. Do not force a weak vacuum to fix poor preparation. Check the pump, seals, and frame alignment before changing the material. A simple test mold can reveal more than an expensive setup. Record heating time, sheet thickness, and defects after each attempt. Your notes may be more reliable than memory.

How to Design and Prepare a Vacuum Forming Mold

How to Vacuum Form Plastic in 2026?

A reliable vacuum-formed part begins with a carefully designed mold. I usually sketch the finished part, then mark its deepest draw and release direction. Add a draft angle of three to five degrees on vertical walls. Rounded corners also help the heated sheet flow evenly and release cleanly. Sharp edges often create thin spots. Keep it simple.

Choose a mold material that matches the project’s size, heat, and production quantity. Sealed wood can suit prototypes, while resin or metal supports repeated heating cycles. The mold surface must be smooth, but not dangerously slippery during handling. Add small vacuum holes near deep corners and broad flat areas. Holes around 0.5 to 1 millimeter can work, depending on the sheet and air path. Connect them to a balanced vacuum channel.

Before forming, check for undercuts, trapped air, and areas that may block removal. A removable insert can solve some difficult shapes. I also allow for material shrinkage and trim space, rather than designing to the exact final edge. That mistake cost me a usable prototype once. Measure twice. Test with a cheap sheet before using production material. Follow the sheet supplier’s heating range, and record forming temperature, heating time, and vacuum response. Small records make later adjustments much more reliable.

How to Heat, Form, Cool, and Release the Plastic

How to Vacuum Form Plastic in 2026?

How to Heat, Form, Cool, and Release the Plastic

Successful vacuum forming starts with controlled heat, not guesswork. Secure the plastic sheet in its frame, then warm it evenly from both sides. The correct temperature depends on the material and sheet thickness, so follow its technical data. Watch for a smooth, consistent sag. Wrinkles, dull patches, or sharp ripples usually indicate uneven heating.

Keep the mold clean, dry, and properly vented. When the sheet reaches forming temperature, lower it steadily over the mold and start the vacuum immediately. Small vent holes should reach recessed areas, corners, and deep details. A strong vacuum cannot fix trapped air. Use heat-resistant gloves, eye protection, and adequate ventilation during operation.

Keep the vacuum running while the plastic cools against the mold. This prevents shrinking away from important features. Cooling may take several minutes for thicker sheets. Do not rush this stage. I have released parts too early, and their edges softened noticeably. A draft angle helps the finished piece separate cleanly. Flexible plastic may need gentle air pressure or careful hand release, never forceful prying. Check the mold after each cycle. A small scratch or blocked vent can repeat the same defect many times. The process is reliable, but it still rewards patience and honest inspection.

How to Trim, Inspect, and Improve the Finished Part

After vacuum forming, trimming decides whether the part looks finished or merely acceptable.

Let the sheet cool before cutting. Warm plastic can distort under pressure. Use a rigid template, sharp tooling, and steady feed speed. Leave a small allowance for final sanding. This prevents oversized openings and uneven edges.

Inspect every part under bright, angled light. Check wall thickness with calipers at corners, curves, and deep draws. Look for webbing, whitening, pinholes, sink marks, and warped flanges.

Fit the part against its mating component, not only against the drawing. A clean edge may still hide poor alignment. Record measurements, material temperature, forming time, and cooling conditions. A simple inspection sheet improves repeatability.

A first sample is rarely perfect.

I still find defects after trimming. That is useful evidence. If the flange bends, review cooling support before changing the cutting process.

If corners become thin, adjust sheet heating or improve mold radii. If burrs remain, check tool sharpness and cutting direction.

Sanding can refine an edge, but it cannot repair a badly stretched wall. Use controlled trials, changing one variable at a time. Keep rejected samples for comparison. They often reveal process drift better than memory. Small improvements matter.

Go to Top