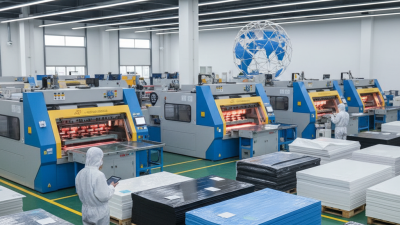
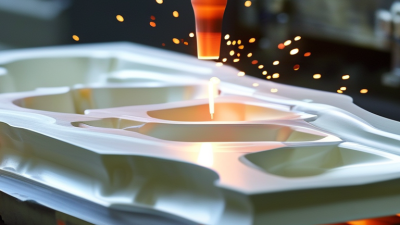
The thermoforming process converts a heated plastic sheet into a precise three-dimensional product. The sheet softens above its forming temperature, then vacuum, pressure, or both pull it against a mold. Cooling fixes the shape. Trimming removes the flange. Simple in theory. Demanding in practice.
Grand View Research estimates that the global thermoforming plastics market reached approximately USD 14.5 billion in 2023. Its report also projects continued growth through 2030, supported by food packaging, medical products, automotive parts, and consumer goods. Smithers’ industry analysis similarly identifies lightweight packaging and recyclable materials as important development drivers. These figures are useful, but they are not perfect. Market definitions differ, and regional production data can shift quickly.
Thermoforming authority J. L. Throne wrote, “Thermoforming is the process of heating a thermoplastic sheet and forming it over a mold.” That description captures the core operation, yet production requires much more judgment. Operators watch sheet sag, mold temperature, plug-assist timing, and cooling balance. A thin corner may look acceptable after trimming, then warp during storage. A glossy tray may hide uneven wall thickness. Practical experience exposes these weaknesses.
This guide examines the thermoforming process from material selection to final inspection. It explains how heating profiles, mold design, vacuum strength, and cycle time influence quality. It also considers sustainability claims carefully. Recycled content can reduce virgin resin use, but contamination and inconsistent melt behavior remain serious challenges. Reliable results come from measured trials, documented settings, and honest review of failures.
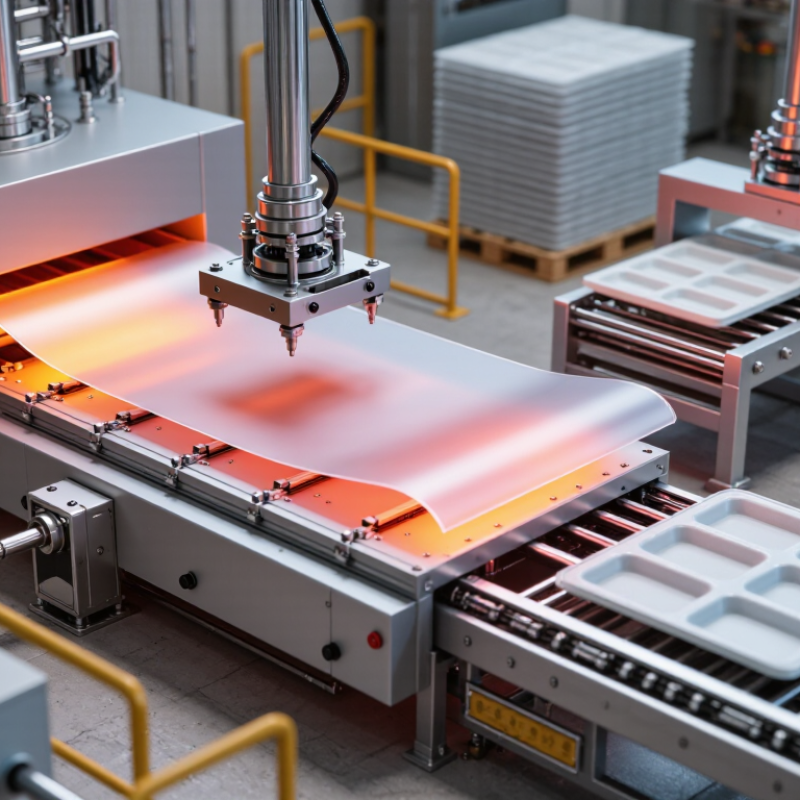
How Does the Thermoforming Process Work?
Selecting the thermoplastic sheet is a critical production decision. Typical packaging gauges range from 0.2 to 1.5 mm. A 0.2 mm sheet can suit lightweight lids, shallow covers, and blister-style cavities. It heats quickly and uses less material. However, it may lose stiffness around deep corners or narrow sealing edges.
Thicker sheets, such as 0.8 to 1.5 mm, provide stronger trays and protective packs. They usually need more controlled heating time. If the surface softens unevenly, the formed part can show webbing, thin corners, or surface marks. This is easy to underestimate. Operators should check sheet temperature, mold contact, and cooling conditions rather than rely only on machine settings.
The process begins when heaters soften the selected sheet. Vacuum, air pressure, or both then pull it against a shaped mold. Cooling fixes the geometry before trimming removes the excess flange. Gauge affects every stage. A thin sheet may form quickly but demand careful handling during cutting. A thick sheet may hold its shape better, yet require slower heating and stronger trimming control.
Measure it.
Practical checks include caliper readings, visual inspection, and wall-thickness tests at corners and deep-draw areas. The nominal gauge is only a starting point. Actual performance also depends on material type, mold depth, heating profile, and package design. A trial run may reveal that the chosen thickness works well on flat sections but fails near the base radius. That result deserves adjustment, not assumption.
Thermoforming begins by heating a plastic sheet until it reaches its workable forming range. This range often falls between 120°C and 200°C, depending on the polymer, thickness, and grade. A sheet must become flexible, not liquid. For one material, 120°C may be sufficient; another may require temperatures near 200°C. Always confirm the supplier’s technical data before setting the oven.
During production, infrared heaters warm the sheet from both sides. Uneven heating can create thin corners, wrinkles, or incomplete details. Operators often check surface temperature with a calibrated infrared thermometer, then compare it with test parts. The sheet should sag slightly under its own weight. Too little sag suggests insufficient heat, while excessive sag may indicate overheating or extended heating time.
The heated sheet moves over a mold, where vacuum or air pressure pulls it into shape. Cooling then fixes the geometry before trimming removes the excess material. The process looks simple in diagrams, but real sheets behave imperfectly. A clean surface does not prove uniform temperature. Mold temperature, room airflow, and heater distance can all change the result. Small trials are worthwhile. A practical adjustment may involve reducing heater power, not changing the target temperature. This distinction prevents avoidable defects and preserves material strength.
How Does the Thermoforming Process Work?
Form the Heated Sheet Using Vacuum Pressure up to 0.9 bar Differential
Thermoforming starts with a flat thermoplastic sheet held in a frame. Infrared heaters warm it until the material reaches its forming window. The sheet must soften evenly, not simply become hot. Uneven heating can create thin corners, webbing, or visible stress marks.
The mold then rises, or the heated sheet moves over it. A vacuum removes air between the sheet and mold surface. Atmospheric pressure pushes the sheet tightly against the mold. With a pressure difference up to 0.9 bar, every square centimeter receives roughly 9 newtons of forming force. A larger mold area therefore produces considerable total force. Small leaks can reduce this effect.
The result depends on more than vacuum strength. Vent locations, sheet temperature, mold texture, and draw depth all influence surface detail. Cooling channels help the formed part keep its shape before trimming. Real production is less tidy. A temperature reading may look correct while the sheet still forms unevenly. Operators should check wall thickness, corner definition, and dimensional stability after cooling. This evidence is more reliable than relying on machine settings alone. Some materials also need adjusted heating times or controlled pre-stretching. Not every sheet responds identically. Careful trials remain necessary.
Forming pressure generated by vacuum pressure up to 0.9 bar differential
During thermoforming, a heated thermoplastic sheet is drawn against a mold by reducing the pressure beneath it. At sea-level atmospheric pressure, a 0.9 bar pressure differential is approximately equal to 90 kPa of theoretical forming pressure. Actual results depend on material temperature, mold geometry, sealing quality, and air evacuation speed.
In thermoforming, cooling is not a passive final step. The formed sheet remains flexible until its temperature drops below the polymer-specific softening threshold. The mold must hold the geometry during this transition. Otherwise, shrinkage, warpage, or springback can appear.
Amorphous polymers should cool below their glass-transition temperature before release. Semi-crystalline polymers need controlled cooling through crystallization, which can create uneven shrinkage. ABS may require cooling below its approximate 105°C glass-transition range, while PETG softens near 80°C. These values vary with grade, additives, thickness, and processing history. Use thermocouples, not assumptions. Cooling is rarely uniform.
Mold channels, compressed air, and balanced wall thickness help remove heat consistently. A thick corner may stay soft after the surface feels firm. That mistake causes deformation during ejection. The U.S. Department of Energy reports that process heating represents about 51% of manufacturing energy use, making efficient thermal control important. Plastics—The Fast Facts 2024 reports 413.8 million tonnes of global plastics production in 2023. Even modest cycle improvements can therefore affect substantial production volumes. However, faster cooling is not automatically better. Excessive thermal gradients can lock in stress, and the part may look acceptable while failing later. Verify release temperature with trials, dimensional checks, and repeat measurements.
Cooling removes heat from the formed sheet so the part can retain its geometry during demolding. The practical release temperature depends on the polymer, wall thickness, mold temperature, and dimensional requirements.
| Polymer | Typical Softening Reference | Typical Sheet Forming Range | Practical Cooling / Release Target | Common Cooling Approach | Key Cooling Consideration |
|---|---|---|---|---|---|
| ABS | Vicat softening temperature: approximately 95–110°C | Approximately 140–180°C | Usually below approximately 80–95°C before demolding | Water-cooled mold channels, air cooling, and vacuum release after sufficient rigidity develops | Uneven cooling can cause warpage, especially in thick ribs and corners. |
| HIPS | Vicat softening temperature: approximately 85–100°C | Approximately 130–170°C | Usually below approximately 75–90°C before demolding | Conduction through a temperature-controlled mold with forced air or water-assisted cooling | Fast cooling improves cycle time but may increase residual stress. |
| PP | Crystalline melting range: approximately 160–170°C; no sharp glass-transition-based softening behavior | Approximately 170–220°C | Commonly cooled below approximately 100–120°C, depending on geometry and crystallinity | Actively cooled mold surfaces, internal air circulation, and controlled demolding | Shrinkage continues during crystallization; cooling uniformity is critical for dimensions. |
| PETG | Glass-transition temperature: approximately 75–85°C | Approximately 150–190°C | Typically below approximately 65–75°C before release | Temperature-controlled molds with moderate air or water-assisted heat removal | Releasing too early can cause surface marking and loss of detail. |
| PVC | Glass-transition temperature: approximately 75–85°C for rigid PVC; formulation-dependent | Approximately 140–180°C for rigid grades | Typically below approximately 65–75°C before demolding | Controlled mold cooling and gentle forced air; avoid excessive local heating | Overheating can cause discoloration and thermal degradation, so temperature control is important. |
| PMMA | Glass-transition temperature: approximately 100–105°C | Approximately 160–200°C | Usually below approximately 85–95°C before demolding | Gradual mold cooling with controlled airflow to protect optical quality | Rapid, uneven cooling may create optical distortion or residual stress. |
| PC | Glass-transition temperature: approximately 145–150°C | Approximately 180–230°C | Often below approximately 120–140°C before demolding | Strong mold-temperature control, sustained contact cooling, and carefully balanced airflow | Because the softening range is high, the part may need a longer cooling stage. |
| HDPE | Crystalline melting range: approximately 125–135°C; grade-dependent | Approximately 150–210°C | Commonly cooled below approximately 90–110°C before release | Actively cooled molds and controlled airflow, with sufficient restraint during shrinkage | High shrinkage and crystallization can continue after demolding. |
Thermoforming heats a plastic sheet until it becomes flexible. A vacuum or pressure then pulls the sheet over a mould. After cooling, the formed part is trimmed to its final profile. The global thermoformed plastics market was valued at approximately USD 15.98 billion in 2023, according to Grand View Research. That scale increases the need for repeatable dimensional control.
Trim accuracy near ±0.5 mm begins with stable datums, not the cutting tool alone. Operators should secure each part against the same reference points. CNC routers, matched dies, or five-axis trimming systems can then follow the programmed edge. A burr may look minor, but it can shift a measurement or prevent proper assembly. Inspectors commonly use calibrated vernier tools, optical systems, or coordinate measuring machines. ISO 20457 provides useful guidance for moulded-part tolerances, although it does not guarantee ±0.5 mm for every thermoformed design.
Cooling changes the result. Material thickness, draw depth, mould temperature, and local shrinkage can move an edge after trimming. Inspect parts at a controlled temperature, record the measurement method, and compare results with the approved drawing. Sampling only the first piece is risky. A later sheet may behave differently. That assumption is easy to regret. In practice, a clean visual edge can still fail a functional check, so inspection should include fit, hole position, wall distortion, and surface damage.